Thursday 16 February 2012

Prerequisites setup for SCCM


Before proceed to installation of SCCM 2007 SP1, we need to add roles & features in the Windows server 2008.

A. Roles

1. Open Server Manager, Click on Add Roles

clip_image001

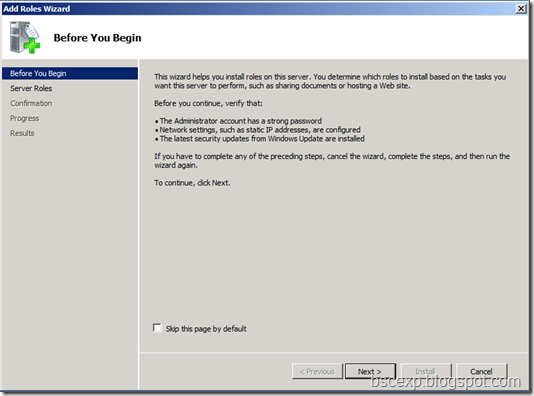
2. In Add Roles Wizard, Click Next 

clip_image002

3. Select Web Server (IIS), Click Next

clip_image003

4. Click Next 

clip_image004

5. Select ASP.NET

clip_image005

6. Click Add Required Role Services 

clip_image006

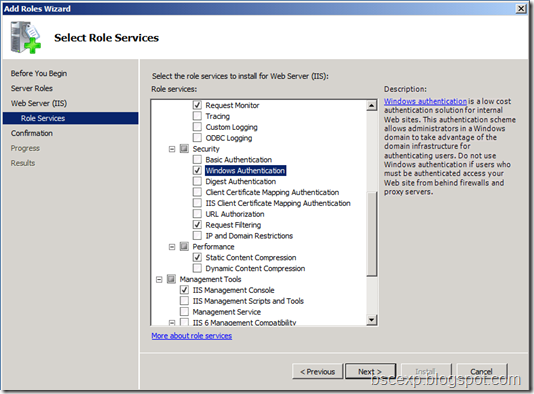
7. Please ensure roles are checked as below:

Static Content
Default Document
Directory Browsing
HTTP Errors
ASP.NET
.NET Extensibility
ASP
ISAPI Extensions
ISAPI Filters
HTTP Logging
Request Monitor
Windows Authentication
Request Filtering
Static Content Compression
IIS Management Console
IIS 6 Metabase Compatibility
IIS 6 WMI Compatibility

clip_image007

clip_image008

8. Click Next

clip_image010

9. Click Install

clip_image011

10. Installation Completed. Click Close

clip_image012

B. Add Features 

1. Click Add Features

clip_image013

2. Select Background Intelligent Transfer Service (BITS)

clip_image014

3. Click Add Required Role Services 

clip_image015

4. Select Remote Differential Compression, Click Next

clip_image016

5. Click Next

clip_image017

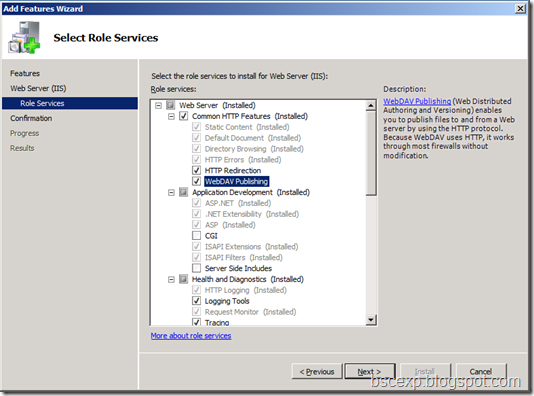
6. Select WebDAV Publishing, Click Next

clip_image018

7. Click Install 

clip_image019

8. Installation completed. Click Close 

clip_image020

C. Enabling WebDAV Publishing by Using IIS Manager

1. Go to select Roles > Web Server (IIS) > Internet Information Service

clip_image021

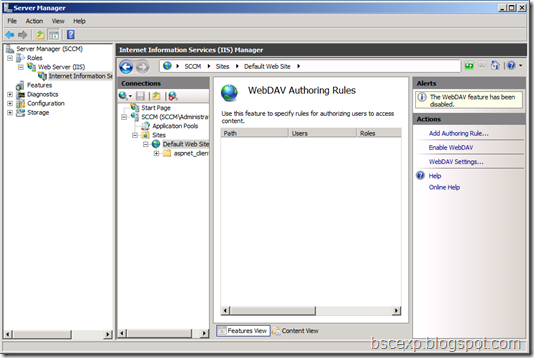
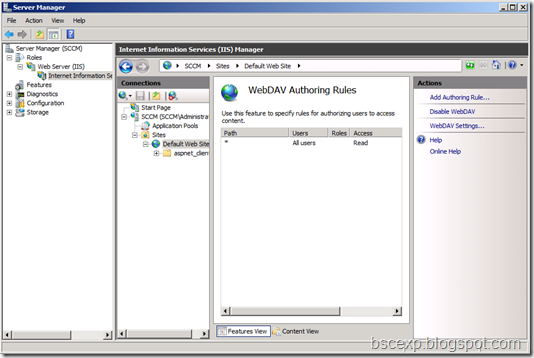
2. In Connection Pane, Select Sites > Default Web Site. Double Click on WebDAV Authoring Rules

clip_image022

3. When the WebDAV Authoring Rules page is displayed, click the Enable WebDAV task in the Actions page.

clip_image023

4. Once WebDAV has been enabled, click the Add Authoring Rule task in the Actions pane.

clip_image024

5. In Add Authoring Rule window, Select All Content, All users, READ then OK

clip_image025

6. Result will shown on WebDAV Authoring Rules window.

clip_image026

7. Click WebDAV Setting in Action pane

clip_image027

8. Change Allow Anonymous Proper value to True 

clip_image028

9. Change Allow Custom Properties value to False 

clip_image029

10. Change Allow Property Queries value to True 

clip_image030

11. Change Allow Hidden File… value to True

clip_image031

12. Once complete, click Apply in Action pane.

clip_image032

13. After apply, The changes have been successfully saved.

clip_image033

14.  From C:\Windows\System32\inetsrv\config open applicationHost.config file.

clip_image034

15. At the <requestFiltering> section verify that allowUnlisted=”true”. The file extensions from the list are blocked if they are part of the packages on the Distribution Points.

clip_image035

16.  At the <handlers accessPolicy=”Read, Script”> section verify that a WebDAV entry exists.

clip_image036

Active Directory Service Interfaces Editor (ADSI Edit)

 
To publish information from the AD site in Configuration Manager 2007, we need to create System Management container.
1. Go to Start Menu select Run and enter adsiedit.msc then click OK
clip_image001
2. In the ADSI Edit console, right click ADSI Edit and select Connect to…
clip_image002
3. By default, Click OK
 image
4. In the ADSI Edit console expand Default naming context, then the DC=hyper,DC=com container, right-click the CN=System container and select New > Object.
clip_image003
5. In the Create Object window select container and click Next.
clip_image004
6. In the Create Object window type System Management and click Next.
clip_image005
7. In the Create Object window click Finish.
clip_image006
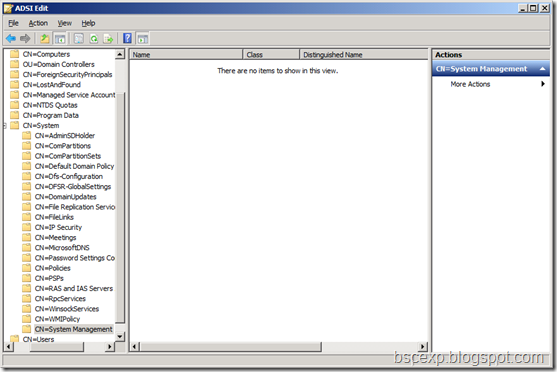
8. In ADSI Edit console view the newly created container then close the console.
clip_image007
9. Launch Active Directory Users and Computers. Right click the desired container and select New > Group.
clip_image008
10. In the New Object – Group window type ConfigMgrServers as the group name and click OK.
clip_image010
11. Right-click the newly created group and select Properties.
clip_image011
12. In the Properties window select the Members tab and click Add.
clip_image012
13. In the Select Users, Contacts, Service Accounts or Groups window click Object Types.
clip_image013
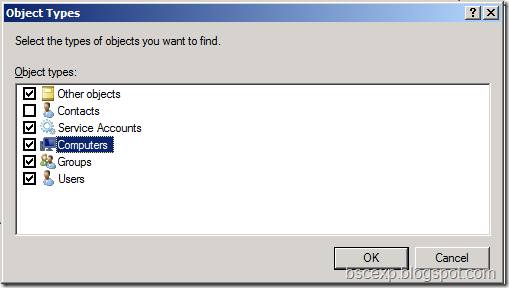
14. In the Object Types window select Computers and click OK.
clip_image014
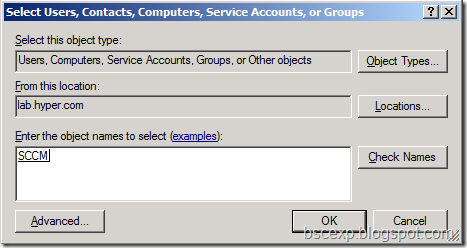
15. In the Select Users, Contacts, Computers, Service Accounts or Groups window type the name of the Configuration Manager server, click Check Names then click OK.
clip_image015
16. In the Properties window click OK.
clip_image016
We need to add permissions to ConfigMgrServers group into the System Management container.
17. In the Active Directory Users and Computers console select View, Advanced Features.
clip_image017
18. Right-click the System Management container and select Properties.
clip_image018
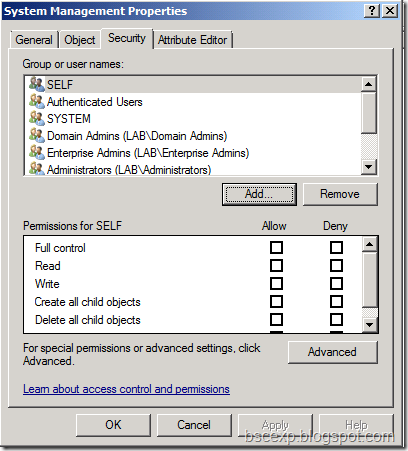
19. In the System Management Properties window select the Security tab then click Add.
clip_image019
20. In the Select Users, Computers, Service Accounts or Groups window type ConfigMgrServers and click Check Names then click OK.
clip_image020
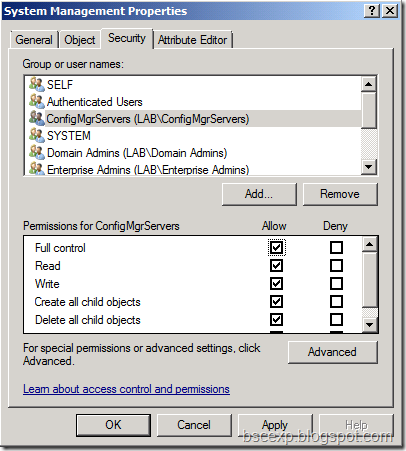
21. In the System Management Properties window give the Full Control permission to the ConfigMgrServers group (all checkboxes will be selected) then click Advanced.
clip_image021
22. In the Advanced Security Settings for System Management window select the ConfigMgrServers group from the list then click Edit.
clip_image023
23. In the Permission Entry for System Management window, in the Apply to dropdown select This object and all descendant objects then click OK.
 clip_image024
24. In the Advanced Security Settings for System Management window click OK.
clip_image025
25. In the System Management Properties window click OK.
clip_image026
After the installation Configuration Manager 2007 will publish information in this container to allow clients to locate the Site Server.