Thursday 9 December 2021

Azure: Licenses not assigned. License assignment failed for 1 user


Working on Azure portal today and trying to assign license to user. 
But keep receive error "License not assigned. License assignment failed for 1 user."


Wondering what could be missing for Global Administrator roles. Thank you to CJ for help on resolved this.


Usage Location – Why it is important?

This property is the one used while assigning a license to a user in office 365. Some services in Office 365 are not available in certain countries and “Microsoft” determines this with the help of UsageLocation. 

This is a mandatory property that needs to be assigned while assigning the license.


After updated the Usage Location, no issue to assign license to the user now.


Saturday 9 October 2021

Power Automate: Proper Case String Workaroud

There is Proper functions in Power Apps to converts any first letter of a word to Uppercase.

But there is no Proper case function in Power Automate yet. 

Reference to a blog post written by Paul Murana to achieve the same result.


Below is the Input.


and here is the Output.


Follow the steps below:

  1. Create Data Operation - Compose to input the string.


  2. Create Control - Apply to each and add Data Operation - Compose inside.


  3. In Apply for Each, using referencing function to call Compose output. Enter Expression below:

    split(outputs('Compose'), ' ')


  4. In Compose - Proper, enter Expression into Inputs as below:

    if(equals(length(item()), 1), toupper(item()), concat(first(toupper(item())), toLower(substring(item(), 1, sub(length(item()), 1)))))


  5. Create Data Operation - Compose for Result.


  6. In Compose - Result, enter Expression into Inputs as below:

    join(outputs('Compose_-_Proper'), ' ')

    You have Proper Case function in Power Automate now.

Power Automate: Return value from Execute a SQL Query (V2)

Working on Power Automate aka Flow to retrieve result from Execute a SQL query (V2).

Wondering where is Dynamic Content for Execute a SQL query (V2) ?


Execute a SQL query (V2) response:


Add Compose action underneath and go to expressions and paste this in.

    body('Execute_a_SQL_query_(V2)')?['resultsets']['Table1'][0]['Approved']


It just work like a charm !


SharePoint Online: How to Restrict Download for Document library


For IRM protected document library, you will see this error while uploading protected or digitally signed PDF files. Something that working fine for Sharepoint 2010 but NOT for SharePoint Online.

According to Microsoft article:

IRM protection cannot be applied to protected documents as SharePoint needs to open the documents on upload

This is most demanded features for SharePoint Online UserVoice suggestion. 
Unfortunately, This UserVoice instance is no longer available anymore. While waiting for Microsoft to allow upload password protected / AIP protected / digitally signed PDF files in SharePoint IRM document library, workaround need to be in place.

Since we are not able to upload protected PDF into IRMed folder, only option is upload into non-IRM folder. 

To further protect the PDF, customer have asked on how to restrict download PDF from document library.


How to hide/restrict Download from the document library ?


Please follow the step below to remove Download option.
  1. Navigate to Site Permission > Advanced Permission Settings.
  2. Under Permission, select Create Group.


  3. Under Give Group Permission to this Site, tick View Only and click Create.


  4. Now you won't see Download option for the user assigned with View Only permission.

No Save/Download option in preview too.


SharePoint Online: View Only Permission Level is hidden

Excited to know that there are way to restrict downloading on SharePoint Online Document Library.

But where is the Read Only permission ?


Follow the steps below to Activate it.

Navigate to Site Settings > Site Collection Administration > Site Collection Features.
Look for SharePoint Server Enterprise Site Collection features
Click Activate.


Here you go. View Only permission is available now.


Follow this blog for more tips !


Wednesday 22 September 2021

PowerApps Portal: How to Add Favicon

 To add favicon into PowerApps Portal.

  1. Prepare .ICO file before proceed further. you can use any online site to convert the file. I tried that but not sacrificed with outcome which larger file size from original.

    Tips: just rename .PNG to .ICON will do

  2. You can download it from website as well.

    Quick hack :
    • Enter the domain name like https://www.blogger.com/(must end with '/')
    • Add favicon.ico to the end
    • Press enter (this should be in the URL: https://www.blogger.com/favicon.ico)
    • Right click on the image and click "save image as"

  3. Go to Portal Management Model Driven App and go to Web Files and create new Web File Record. Upload favicon.ico into Notes and published.


  4. Now you will see your Favicon


IIS: Accidentally deleted IIS Binding Port 80

After added HTTPS port for IIS Website, usually I'll remove default port 80. 

Sometime i did regret that deleted it. Reason is when add back the port 80, can't proceed to enter OK with empty hostname.


Spend some time to google but no luck. Go back to the create new Port 80 and enter hostname with URL name. 

Still that not resolve the issue yet. No issue to access the portal from URL name. 

But by hostname and localhost not going to work. 

Go back to Binding setting and try to remove the Host name entered earlier.

Wow ! I'm able to remove the host name and click OK now. 

Keep the post for myself and it could save your time too.

Saturday 4 September 2021

Orchestrator: Runbook Error "The term Get-SCSMObject is not recognized as the name of a cmlet..."

Working on a project to upgrade System Center Service Manager (SCSM) and Orchestrator (SCO) 2019 recently, seeing a familiar error message from Orchestrator Runbook again.

Runbook activity show Failed.


Error : The tern 'Get-SCSMObject' is not recognized as the name of a cmlet, function, script file, or operable program. Check the spelling of the name, or if a path was included, verify that the path is correct and try again.


Resolution: Copy SMLets Folder from System32 to SysWOW64 !

FROM

C:\Windows\System32\WindowsPowerShell\v1.0\Modules

TO

C:\Windows\SysWOW64\WindowsPowerShell\v1.0\Modules


Happily see the activity completed success now !


Tuesday 10 August 2021

Useful CMD commands

Notes to myself for quick reference.

Check User account Locked
    net user UserID /DOMAIN | FIND /I Account Active

Unlock User
    Net user UserID /DOMAIN /active:YES

Change Password
    net user UserID newpassword /DOMAIN /Active:Yes

Check User Details, AD group membership
    net user UserID /do

Check AD Group Details, Member if this Group
    net group GroupID /do


Thursday 29 July 2021

AD: Guide to Create Custom Attribute to User Class

Pre-requisites

Make sure you login as member of Schema Admins.


To enable the Active Directory schema for the first time:

  1. Open an Elevated Command Prompt.

Run the following command:
regsvr32 schmmgmt.dll

A confirmation message is displayed:

To create a new Attribute:

  1. Once you've received the confirmation message, enter the command 'mmc' into the command prompt window to open up a new Microsoft Management Console window.

  2. Choose File > Add or Remove Snap-ins then select the Active Directory Schema option. Double-click or click Add then click OK to load the Snap-in.

3. Once the Snap-in has been loaded, expand this out, right-click on the Attributes entry then select Create Attribute... to continue.

4. Please ensure you read and fully understand the warning as you will not be able to delete created attributes.


5. Please ensure you read and fully understand the warning as you will not be able to delete created attributes.

6. You can retrieve Unique X500 Object ID from here by running the oidgen.vbs.


To Add a new attribute to the User Class:

  1. From the left-hand pane in the console, expand the Classes folder, locate the user class, then right-click and select Properties. The user Properties window is displayed.

  2. Open the Attributes tab then click Add...


  3. Search for the name of your new attribute, highlight this and click OK twice to save the change.


    Warning: These changes can take a few minutes to come into effect within your Active Directory.

    Restart Active Directory Domain Services for immediate effect in your lab. 


  4. You will be able to update the data for this new field within the Attribute Editor tab of a users Active Directory entry.

    Learning something everyday !

Wednesday 21 July 2021

Orchestrator: Runbook Designer throw error "The server threw an exception"

After installed Microsoft System Center Orchestrator 2019 Update Rollup 2, connection error when launch Runbook Designer.


Event ID 10007 found with error Application or service 'Orchestrator Runbook Service' could not be restarted.


I missed the Important section :


Microsoft OLE DB Driver already installed for SQL Server 2019.


One more step that need to be done. Reconfigure the Orchestrator database by using Data Source Configuration.


After completed the step below for Data Source Configuration. Runbook Designer is working good now.


Friday 16 July 2021

SCSM : Data Warehouse Reporting MP Deployment Failed

Microsoft System Center Service Manager (SCSM) 2019 Data Warehouse Management Packs Deployment status was Failed for all the Report Library.


Below is the Operations Manager event logs for management pack error found on Data Warehouse Management Server.


Error Detail:

Deployment Execution Infrastructure has retried the maximum number of times and is giving up on this execution step.

MP Name: ServiceManager.ConfigurationManagement.Report.Library

Operation: Install

Error Message: Install 'Rpdl' operation failed from within 'install' rpdl store = http://servername/ReportServer/ReportService2005.asmx .... Uploading or saving files with .rpdl extension is not allowed.


Cause:

SSRS 2017 version 14.0.600.1274 and later version include a new advanced settings AllowedResourceExtensionsForUpload. This setting restricts the set of extensions of resource files that can be uploaded to the report server. This issue occurs because Service Manager Reporting uses extensions that aren't included in the default set in AllowResourceExtensionsForUpload.

Resolution:
Add *.* to the list of extensions. 

1. Start SQL Server Management Studio, connect to report server instance.
2. Right click the report server name, select Properties and select Advanced.
3. Locate AllowResourceExtensionsForUpload settings, add "." to the list of extension then click OK.
4. No restart reporting services required.
5. Restart Deployment for the failed 


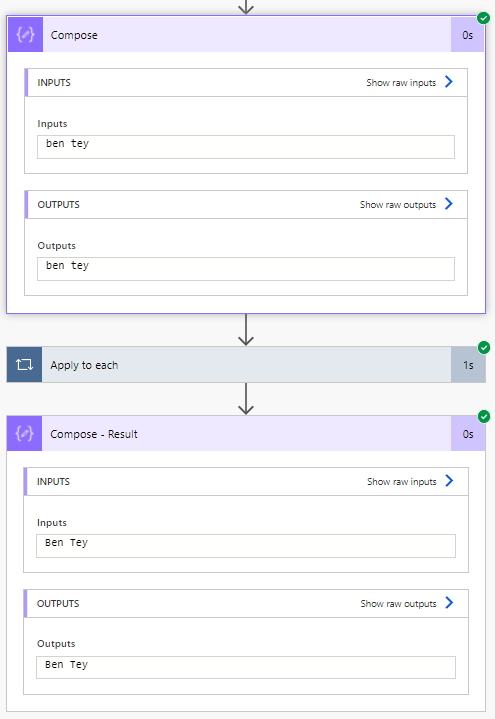
Hooray ! All Reports Library deployment are completed.


Reference: https://docs.microsoft.com/en-us/troubleshoot/system-center/scom/cannot-deploy-operations-manager-reports


Wednesday 14 July 2021

SCSM: An error occurred while executing a custom action:_CreateSrsFolder_SC

Installing Microsoft System Center Service Manager (SCSM) 2019 Data Warehouse server today. 

 An error occurred while executing a custom action:_CreateSrsFolder_SC


1. Make sure SQL Server Reporting Services is running. (Release Notes)
2. Verify if able to access http://ServerName:80/ReportServer/ReportService2005.asmx
3. If prompt for login for http://ServerName:80/Reports, add server name to Internet Options Local Intranet.


That solved my problem and installation completed without error.